Hi Techies, I am back with another Metasploit blog, In our previous blogs, we saw how to use Metasploit, and how to install Metasploit on Windows and Linux, we understood Metasploit Framework, its essential features and a lot of practical stuff.
This blog is going to be special for those who want to know how cyber security analysts, security professionals, pent testers and ethical hackers use Metasploit in the organization.
In this article, I have shown step-by-step how you can use Metasploit Framework in an organized manner. We will learn how to create a workspace in Metasploit, basic Metasploit commands, Metasploit third-party extensions, connect Metasploit with the Postgresql database and much more...
Also, I have created a video of a basic Metasploit tutorial that you can see at the end of this article.
Note: I recommend you to watch my previous blogs if you don't know how to install Metasploit and What is Metasploit Framework also I suggest you read this blog properly and do practical while reading so you can learn quickly.
Tip: The video has some extra content like extra commands and Metasploit usage tips. Read the blog first and at the end watch the video for a better understanding.
- What is Metasploit?
- The Best Platform to Use Metasploit
- Requirements for the Lab
- How to Use Metasploit?
- Basic Metasploit Commands
- Metasploit Tutorial
- Basic Metasploit Commands Cheat Sheet
- Conclusion
- Frequently Asked Questions
What is Metasploit?
Metasploit framework is a very powerful tool that comes with various exploits, payloads, auxiliaries, evasions and nops which are very helpful to exploit systems. Security professionals mostly prefer this tool when pent testing is going to perform. This tool is open-source and makes things easy for ethical hackers, not only for ethical hackers, this tool is very popular among hackers who hack systems and servers using vulnerabilities.
Metasploit can do scanning, enumeration, pre-exploitation, post-exploitation and even clearing tracks. You can create a payload, and inject a backdoor for privilege escalation.
Want to understand more about Metasploit their payloads, framework and working? Don't worry I have a very basic blog for you just click on what is Metasploit
The Best Platform to Use Metasploit
You can download and install the Metasploit framework on any platform like Windows, Linux and Mac. If you want to know how to install then you can check my blog on how to install Metasploit Framework on Windows and Linux.
As I use Metasploit on daily basis, so according to my experience, I suggest Kali Linux is the best platform where you can use Metasploit very effectively. Kali Linux has all the additional resources like Netcat, wordlists, proxy chains and other necessary tools pre-installed that we use in Metasploit during target exploitation. If we don't have a tool or script that is required then we can install it with a single command. On other platforms, these things are not pre-installed and it takes time to set up all the additional things.
Requirements for the Lab
To perform the same practical, that I have shown below you need the following things:
1) Virtual Machine (Virtual box): You need a virtual machine installed in your system to perform the practical. Virtual box and VMware are two software that can help you to build a virtual machine. If you don't have then check my step-by-step installation video by just clicking on how to install a virtual box
2) Metasploitable Virtual Machine: We need a target machine also where we will perform attacks using Metasploit. In this practical, I am going to use Windows 7 machine you can use any machine or Metasploitable 2 machine. If you don't know what is Metasploitable and how to install then check my easy installation guide on Metasploitable
3) Kali Linux: You can find the Metasploit framework tool pre-installed in Kali Linux. If you don't have Kali Linux then check my blog on how to install Kali Linux
How to Use Metasploit?
So now I am not going to tell you normal commands like everyone just shows because you can find them anywhere. I am showing you the exact procedure which is followed by Cybersecurity professionals.
Let's understand how Metasploit is used at the production level.
First, you need to start your database and server, In my case I am using Kali Linux and by default, it has Postgresql that I am going to start and I will use an apache server which is also by default present.
To start Postgresql and the apache server just follow the below sequence of commands.
sudo systemctl start postgresql    //It will start the database

sudo systemctl start apache2       // It will start the server
As I have shown the same in the below screenshot.

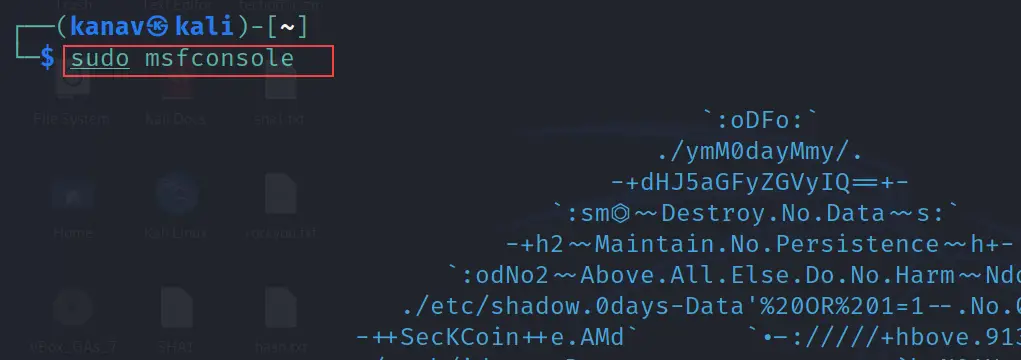
msfconsole
After starting the database and the server, now let's open the Metasploit framework by using the simple msfconsole command
msfconsole
Shown same in the below picture.
db_status
We can use the below command to check the database status. We need to be sure whether it is connected to the Metasploit console or not.
db_status
Check the message "Connected to msf. Connection type: postgresql" in the below snapshot which means our database is connected to the Metasploit framework.

Now we have set up the Metasploit with the database. Let's move further.
We often just use msfconsole command and search for exploits or target services to bypass, but this is not how hackers or Cyber security professionals use this tool. We need to use it in an organized manner.
So what we will do now we will create our separate workspace where we will run the exploits. The basic idea is that we should create a separate workspace for different targets.
workspace
First, we will use the below command to see what workspaces are available.
workspace
As we can see below screenshot we don't have any other workspace except default.

workspace -a
Let's create a new workspace. Assume our target machine is Linux so we will create a new workspace with the name Linux_target. You can use any name you want.
workspace -a Linux_target
See the below screenshot where it is clearly visible that a new workspace is created. So workspace is a command to check available workspaces and workspace -a <name of the workspace> command is use to create new workspace

To enter into the newly created workspace we can refer to the below command.
workspace <name of the newly created workspace>   //syntax

workspace Linux_target  // In my case Linux_target is the name of workspace
Refer to the exhibit.

msfd init
Once you are inside your newly created workspace, just use the below command to initialize your database.
msfd init
I have run the above command and shows the output in the below screenshot.

You might be thinking of why we are starting and initializing the database. what is the use of this in Metasploit?
The answer is simple to make things separate, clean, organized and easily accessible anytime. We are using a database so whatever we perform is going to be saved on the database and whenever we need we can simply run a command to get the required data. Let's understand it's importance with the below scenario.
So, I am going to scan all ports of our target machine from the attacker machine. Our target machine is Metasploitable and the attacker machine is Kali Linux.
We will use namp tool to scan the target. If you don't know what is namp and how to use it or install it you can just see my blog on what is Nmap | How to use Nmap Commands
Normally we run the namp command like nmap -sV <IP address of the target or network> and this command will display the results of the scan on the terminal. So if you run the clear command then everything is going to be deleted.
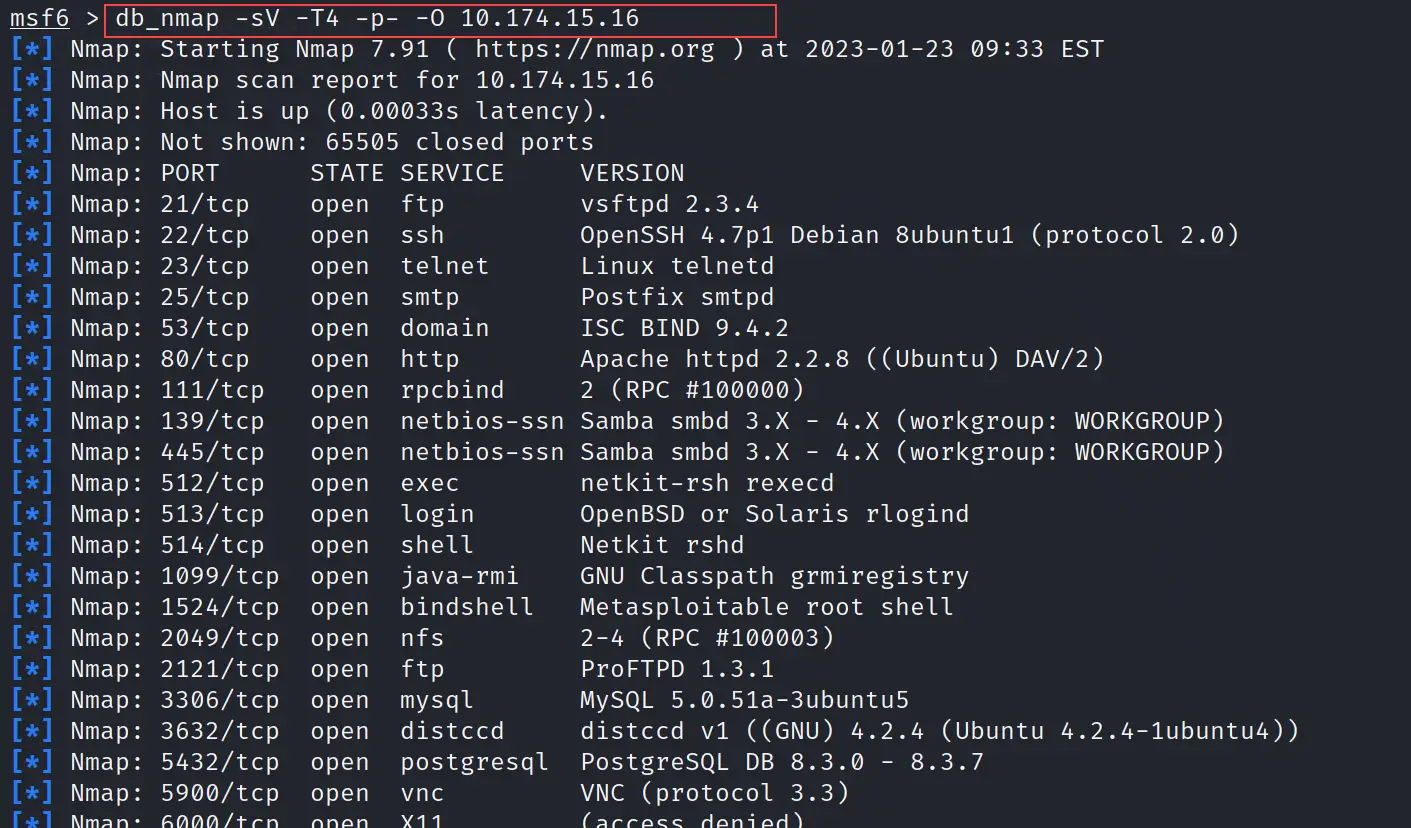
db_nmap
The simple solution is to save every output in the database and it is easy with the db command. See the below command where I run the nmap scan and save the output to the database table as well.
db_nmap -sV -T4 -p- -O 10.174.15.16
The above command not only displays the output but will also save it to the database. The above command uses -sV flag to scan the ports with their versions, T4 is used to increase the speed of the scan, -p- is used to scan all ports and -O is used for operating system detection. 10.174.15.16 is the IP address of the target machine.
See the below output
services
Now you will see the benefit of everything that we have done now.
Just use the below command and it will show you every service that Nmap scans from the target.
services
You can see by running a single-word command we have all the services.
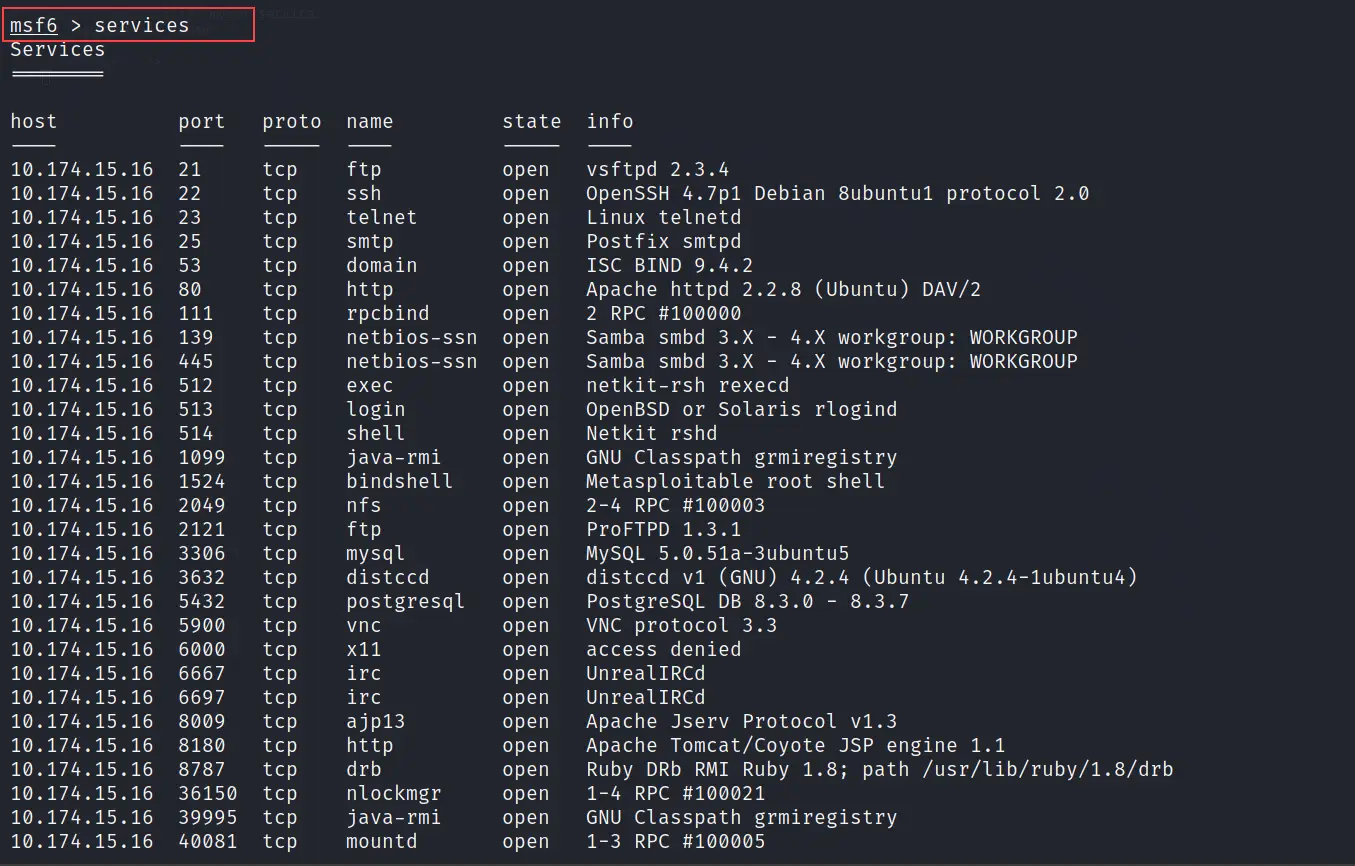
Note: All data is now getting fetched from the database. So if you even close the Metasploit tool, you can still go to your workspace and access the data with the same command. Because everything is in the database. That's the benefit and also the reason for using Metasploit in this way for security professionals.
hosts
If you run the hosts command it will show you all hosts that are discovered by namp. In our case, I have just scanned one IP so hosts command will show only one host, but if you are scanning the network then you might see a lot of hosts.
hosts
refer to the exhibit

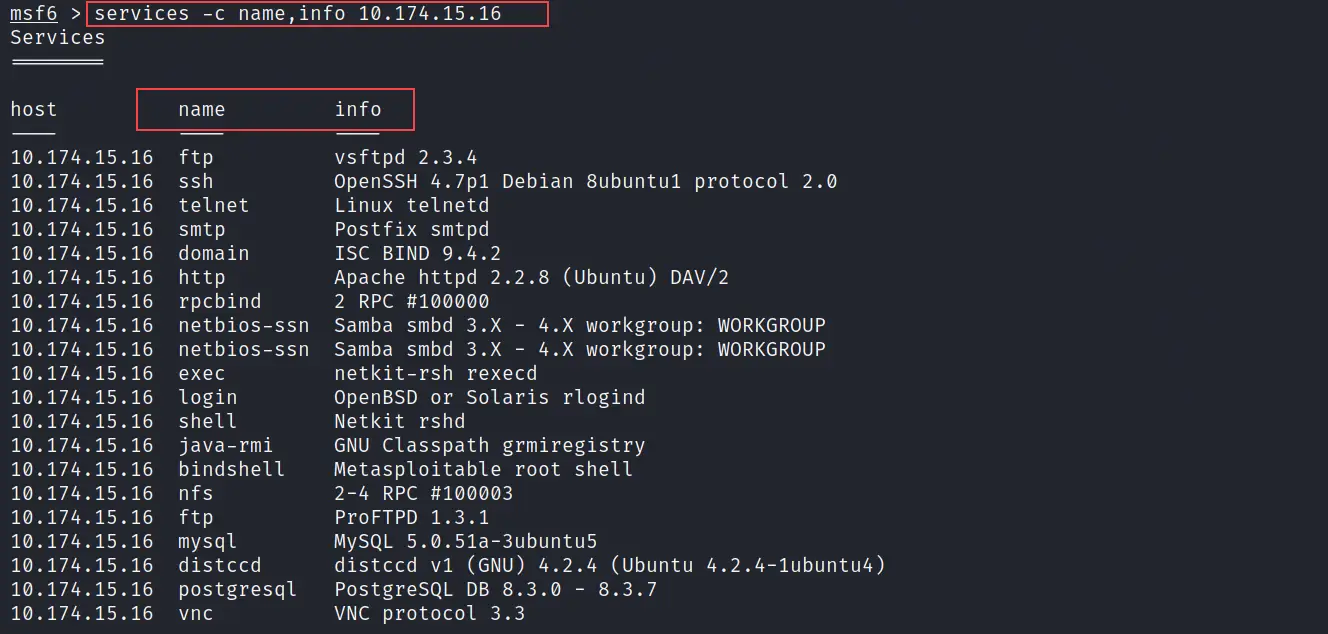
services -c
Let's play more with these commands. So use the below command to customize the output of services.
services -c name,info 10.174.15.16
10.174.15.16 is the target IP. The above command will display only the name and info fields from the services. See the output in the below picture.
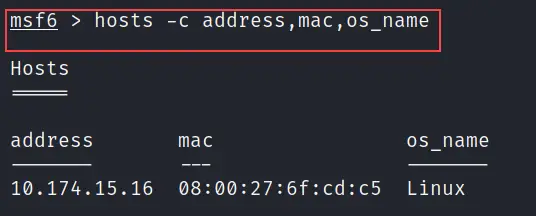
hosts -c
You can also customize hosts command same like services. Check the below command for more reference.
hosts -c address,mac,os_name
The above command will show the IP address, MAC address and the operating system used by all discovered hosts. See the below image.
Basic Metasploit Commands
If you are done playing with the Metasploit with the above commands it means you know now how to use the Metasploit framework.
Let's see some more basic commands that are required when your goal is to find exploits, scanners or payloads and execute them for bypassing host vulnerabilities.
I will not only show you the basic Metasploit commands but also will perform side by side attack on the target machine to get access to the present FTP vulnerability
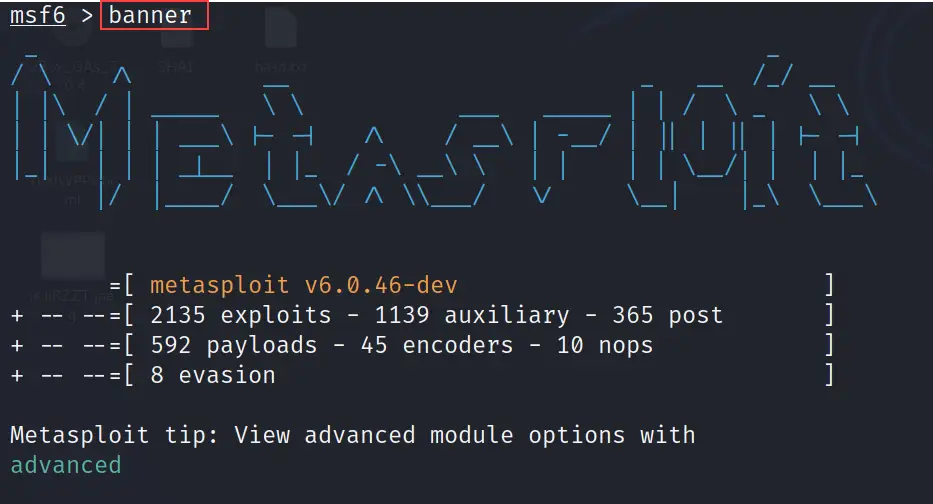
banner
The banner command is used to change the banner of the Metasploit framework.
banner
back
The functionality of the back command is the same as its name. It will help you to browse the previous folder. It is the same as we use cd.. command to go one step back.
back

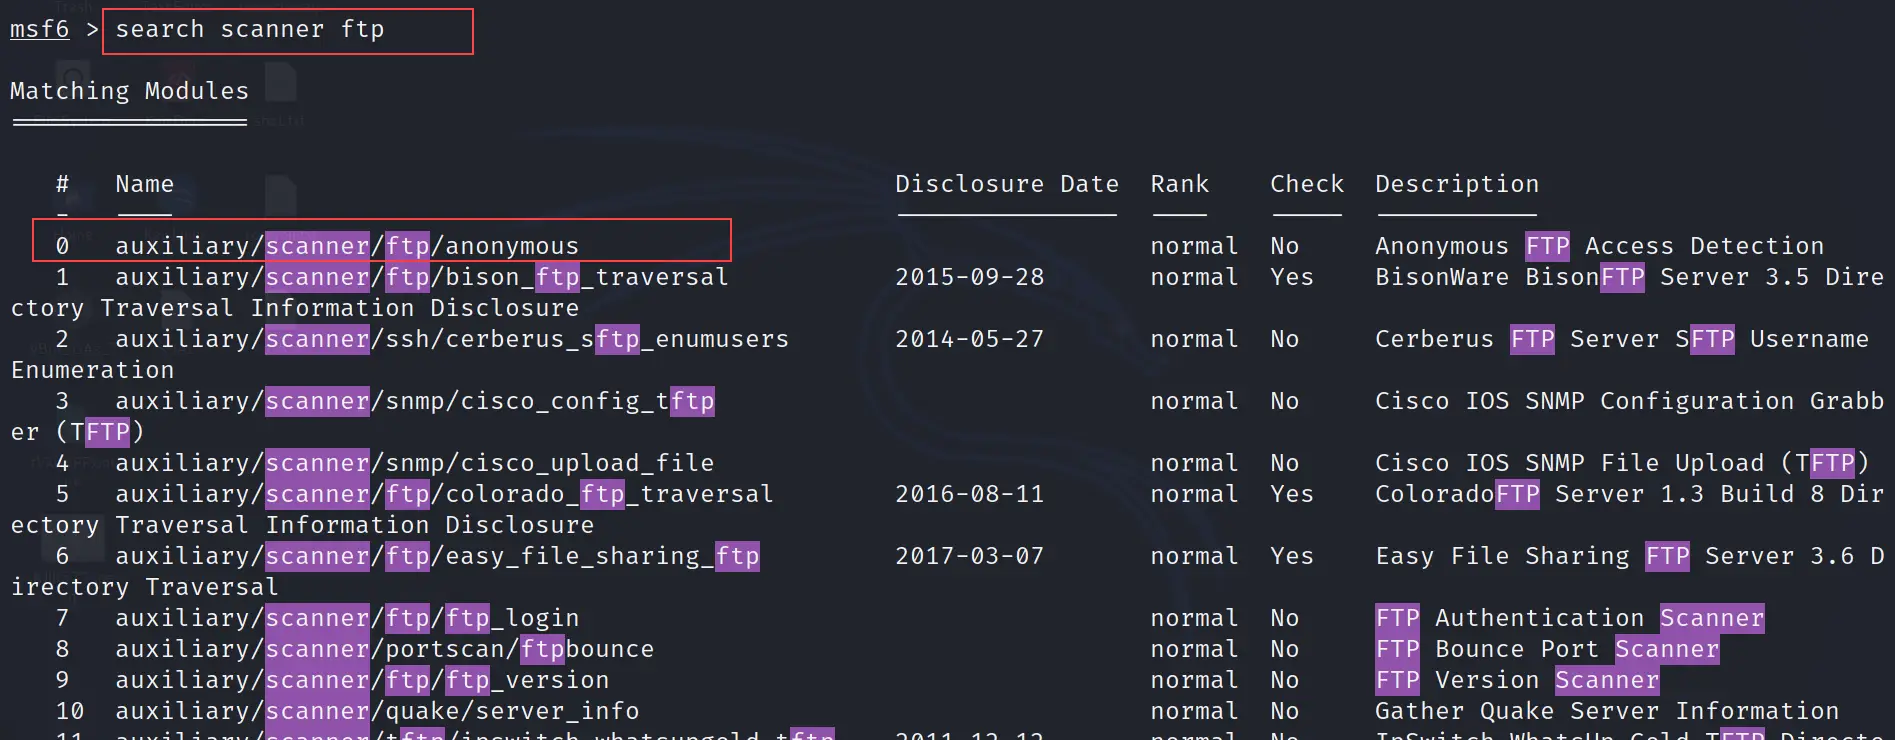
search
The search command is used to search available exploits, payloads, auxiliaries, scanners etc. in the Metasploit framework.
search scanner ftp
The above command will search the scanner for the FTP service. In the below picture, we can see we found auxiliary/scanner/ftp/anonymous
refer to the exhibit.
use
The use command is utilized to enter into the selected scanner or exploit. Basically, this command will use the selected exploit, payload or scanners.
use auxiliary/scanner/ftp/anonymous
This is "auxiliary/scanner/ftp/anonymous" a scanner that will bypass the FTP vulnerability. See the output below.

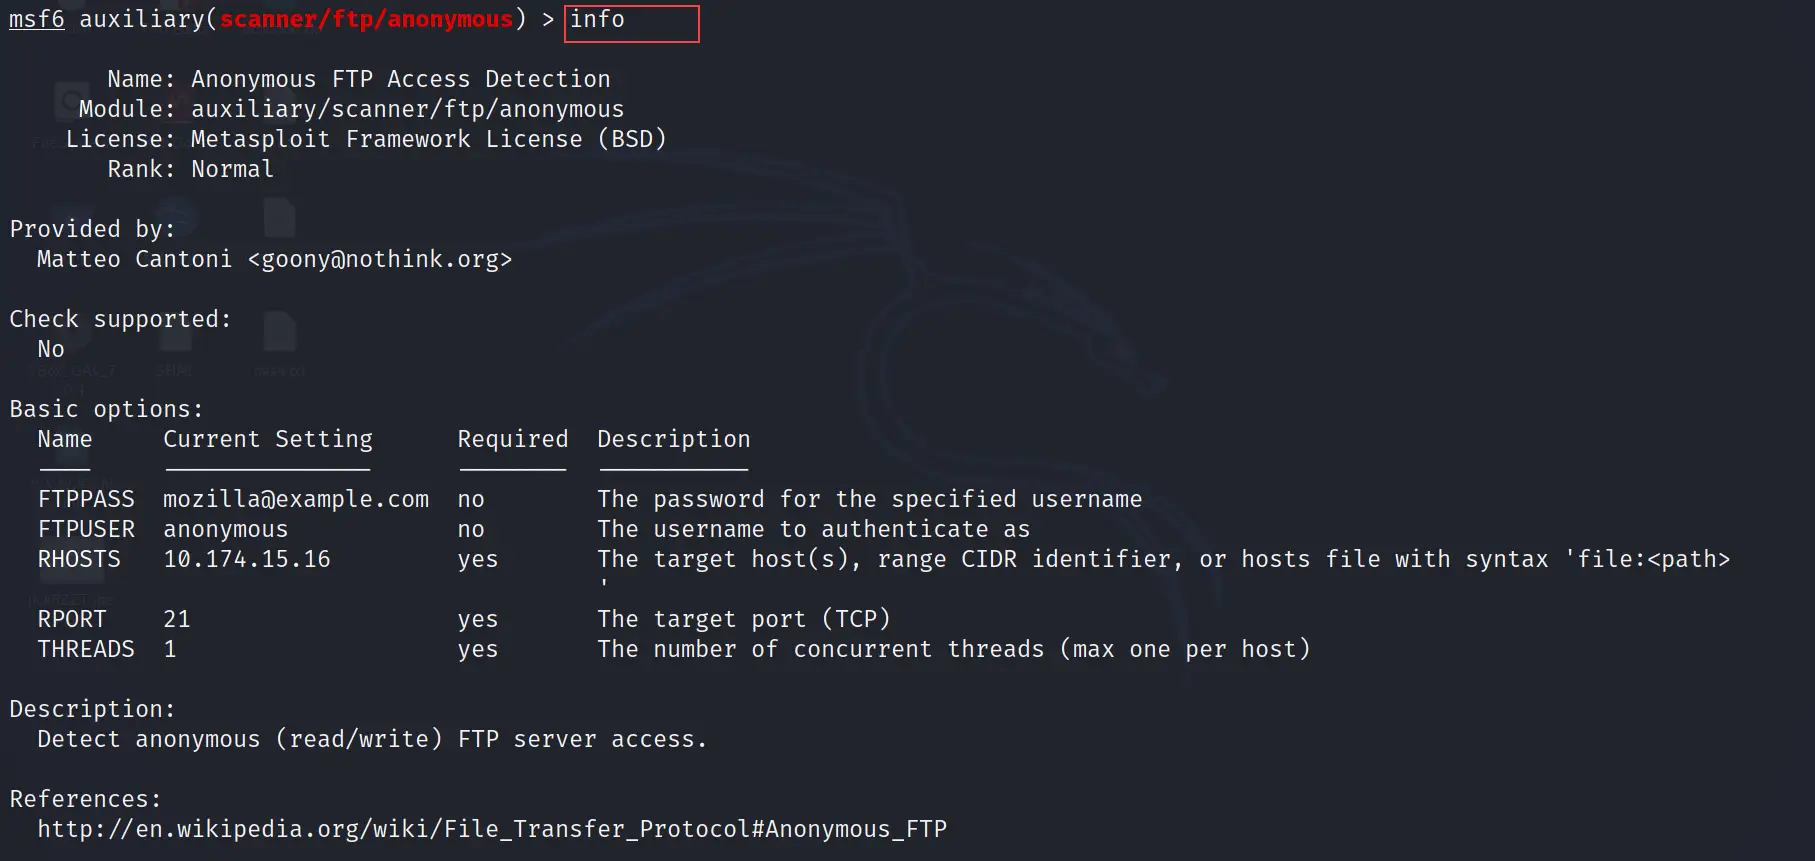
info
You can use the info command to get the information of the selected scanner or exploit. It will tell you everything that is required to run the selected module or what exactly that, module does.
info
As I showed in the screenshot below.
set or setg
The set command is used to assign the IP address in the module. The IP address can be the local host IP or the remote host IP.
The setg command also does the same but the only difference is it set the IP globally which means you don't need to set IP again and again if you are switching between modules in a single session.
setg RHOSTS 10.174.15.16
In the above command, I have set the remote host IP to the selected scanner. See the below output

show options
The show options command will show you the all available options of the selected module. This command is very helpful when you are going to use an exploit and want to check if everything is set up properly or not.
show options

run and exploit
They both run and exploit commands are the same. It is used to execute the exploit or scanner.
run
You can use exploit instead of the run also both will give the same result. See the below image.

As you can see the output in the above image depicts "Auxiliary module execution completed" which means the vulnerable host's FTP service is exploited now.
So we not only learn the basic Metasploit commands but also executed a successful attack on the target machine.
How to Access the Target Machine
Now you all are wondering how the attack is successful. We don't have any session of the target machine.
It varies according to the exploit we use. So in our case, we used an auxiliary for exploiting the FTP port. To access the target machine we need to use the FTP command.
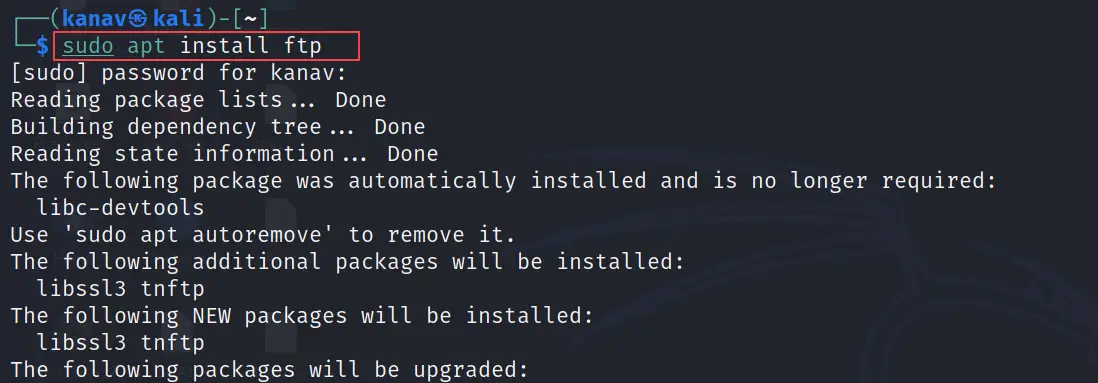
You can install FTP on your machine if you don't have it.
sudo apt install ftp
Now just run the below command to get the FTP session of the target machine.
ftp <IP of the target machine>
Where my target machine IP is 10.174.15.16. After executing the above command it will ask for Name and password so you just need to enter the name anonymous and the password will be blank you just need to hit enter.
See we got access to the FTP session of the target machine.

Metasploit Tutorial
You can see the below video where I have demonstrated each and every basic Metasploit command. I have not only demonstrated the above-mentioned commands but also shown some extra commands on the below video.
Basic Metasploit Commands Cheat Sheet
You can click on the below pdf button to access or download the Metasploit commands cheat sheet. In that sheet, I have added all A to Z commands of Metasploit.
Conclusion
I have tried to cover all popular and most frequent commands that often use in Metasploit. I know my blogs are getting lengthy but trust me I am trying to cover most of the things with my blog.
This is the fourth blog of our Metasploit series where we see how to use Metasploit like a Cyber security professional, and how security professionals are using Metasploit commands on the production level. I have also shared the cheat sheet where you can find all A to Z commands of Metasploit.
For your ease, I have a practical video separately for the Metasploit tutorial. I hope this series of blogs will be helpful in your cybersecurity learning journey.
Below under Related articles I have mentioned the Metasploit blog in sequence so if you are new then you can start.
Frequently Asked Questions
Que 1: Metasploit is a framework used to exploit common software vulnerabilities. How would you protect your system from such attacks?
Ans: You need to make your system upto-date because Metasploit tools are having exploits or payloads that can easily bypass the out-dated services. If your system is upto-date then there are higher chances no exploits or payloads are present or made by anyone.
Que 2: What are some good online resources where somebody can learn to use Metasploit?
Ans: Many sources are available on internet from where you can learn Metasploit but according to my experience I haven't found content in organized manner so I am building the content on my website in organized manner. You can visit my website Techofide where I have started my own Metasploit serires. Also you can follow the offensive security website
Que 3: Installed metasploit framework on windows 10, how do I start using metasploit or where's the terminal in the folder of metasploit?
Ans: I have made a detailed video on how to install Metasploit on Windows 10 and how you can use it from terminal. I hope this will help you.
Que 4: What are the default login details for Metasploitable 2?
Ans: The default login details for Metasploitable 2 is username = msfadmin and password = msfadmin
Que 5: What is Metasploit in Cyber Security?
Ans: Metasploit is a tool that is used by Cyber security professionals for pen testing so they can discover the vulnerabilities to patch them to secure the systems of organizations.
Que 6: What are the four types of modules in Metasploit?
Ans: Basically Metasploit are having 7 type of modules which are Exploits, Payloads, Auxiliaries, Encoders, Evasions, Nops and Post
Related Blogs
- What is Metasploit Framework | What is Penetration Testing | How to use Metasploit
- How to Install Metasploit on Windows and Linux [Step by Step Guide]
- How to Use Metasploit | Meterpreter | Reverse shell | Metasploit Tutorial
- How to Install Kali Linux Step By Step Guide
- Nmap Commands | How to Use Nmap Tool
